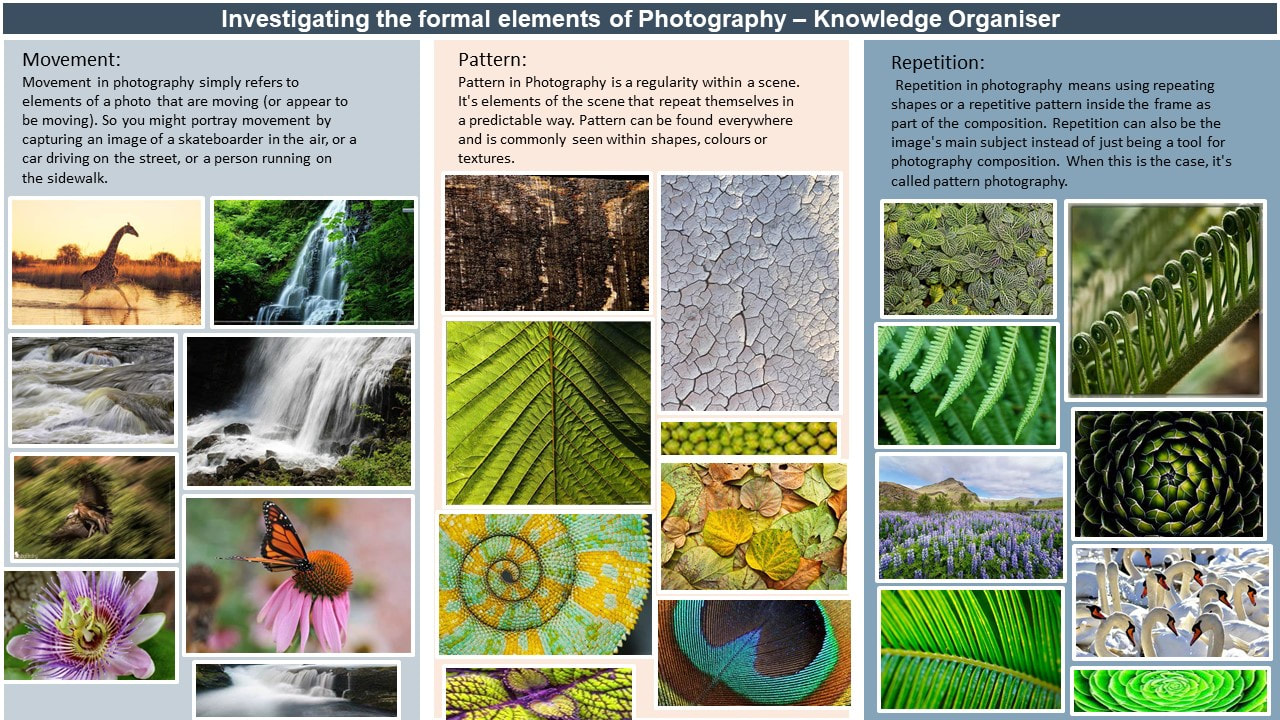
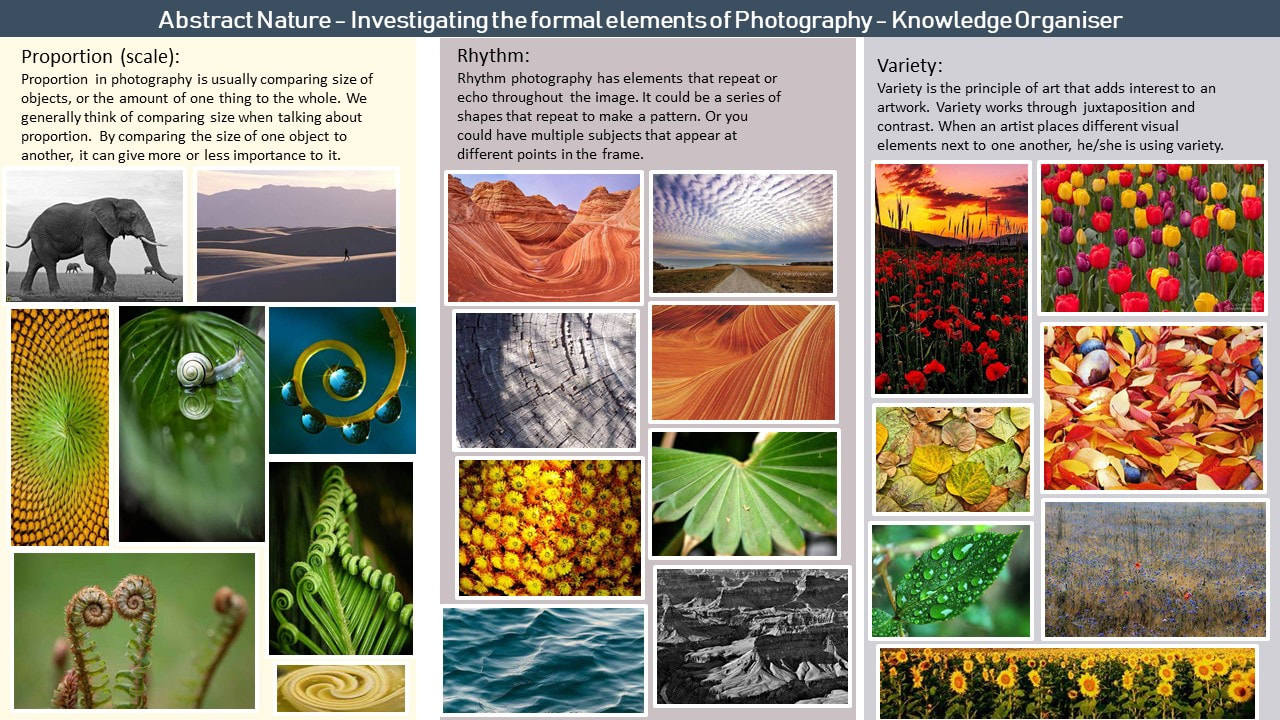
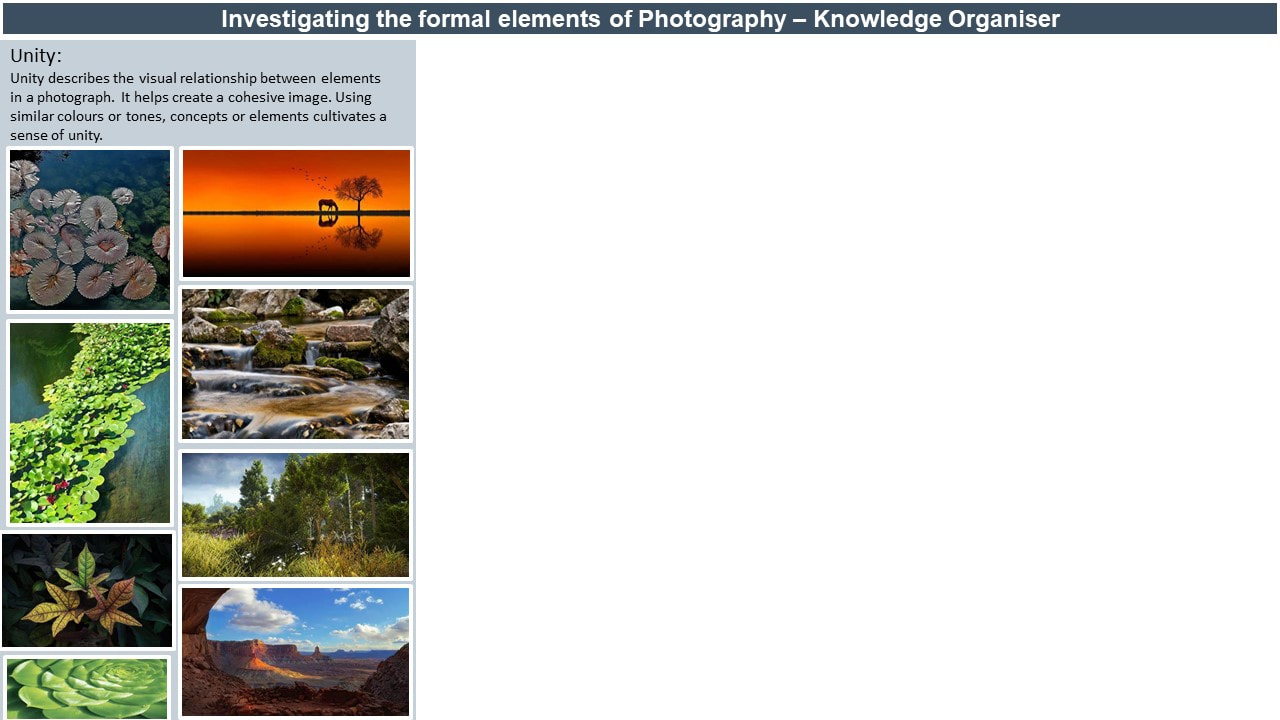
Abstract Nature: Personal Project 1
Abstract Nature : What is Abstraction?
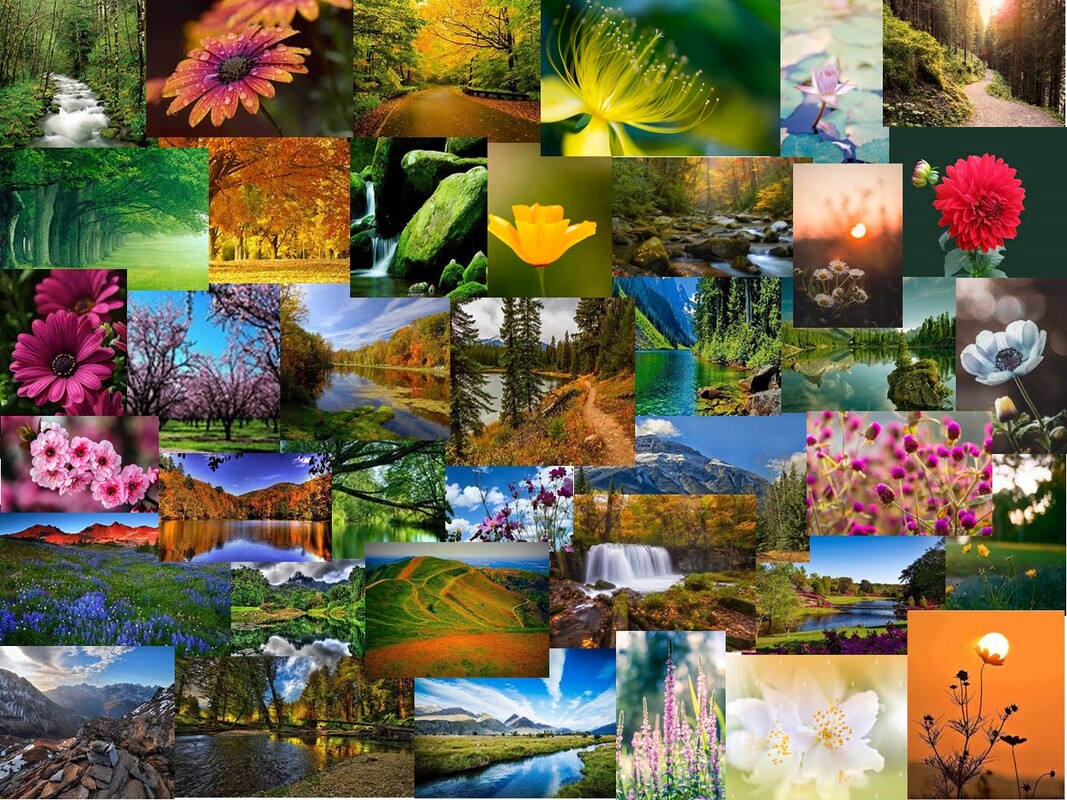
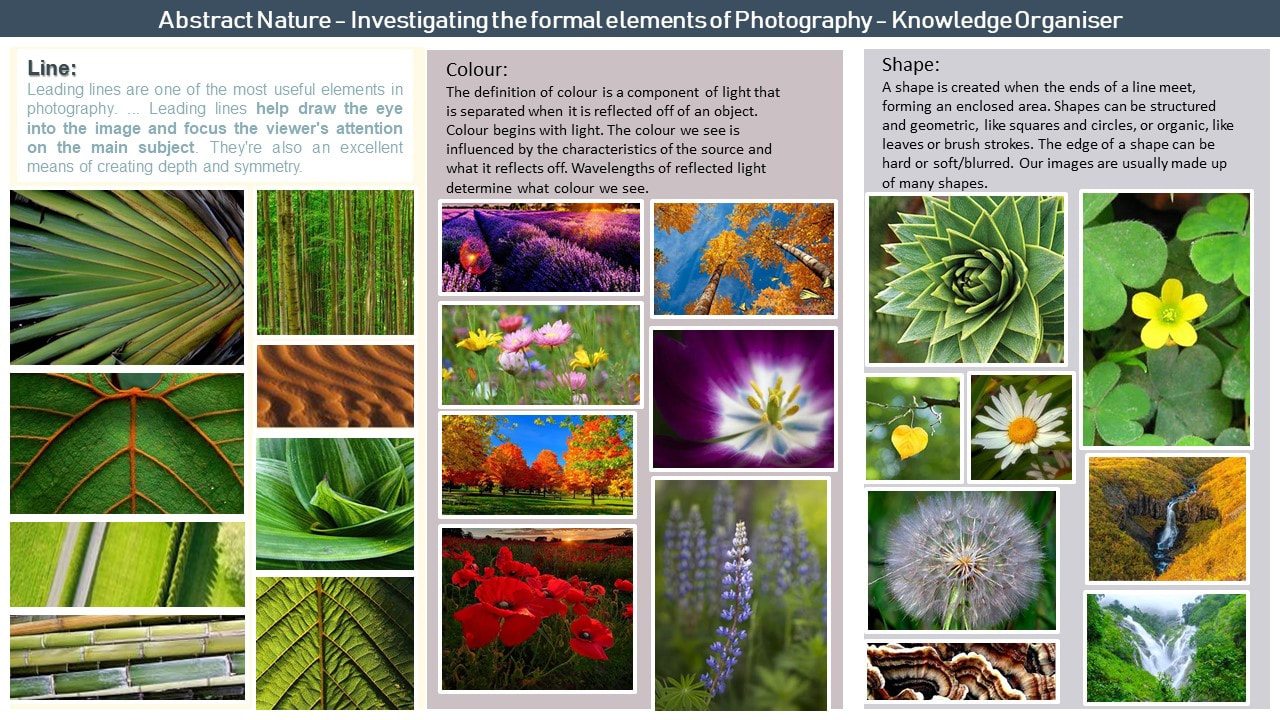
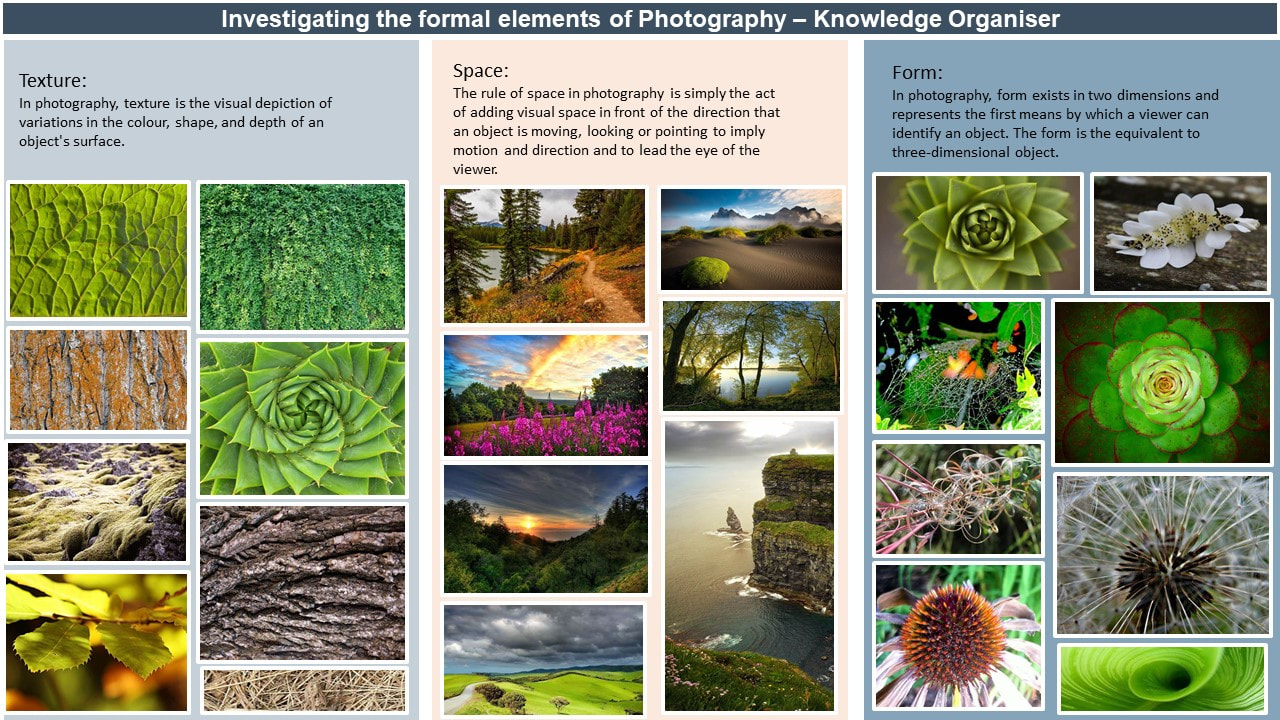
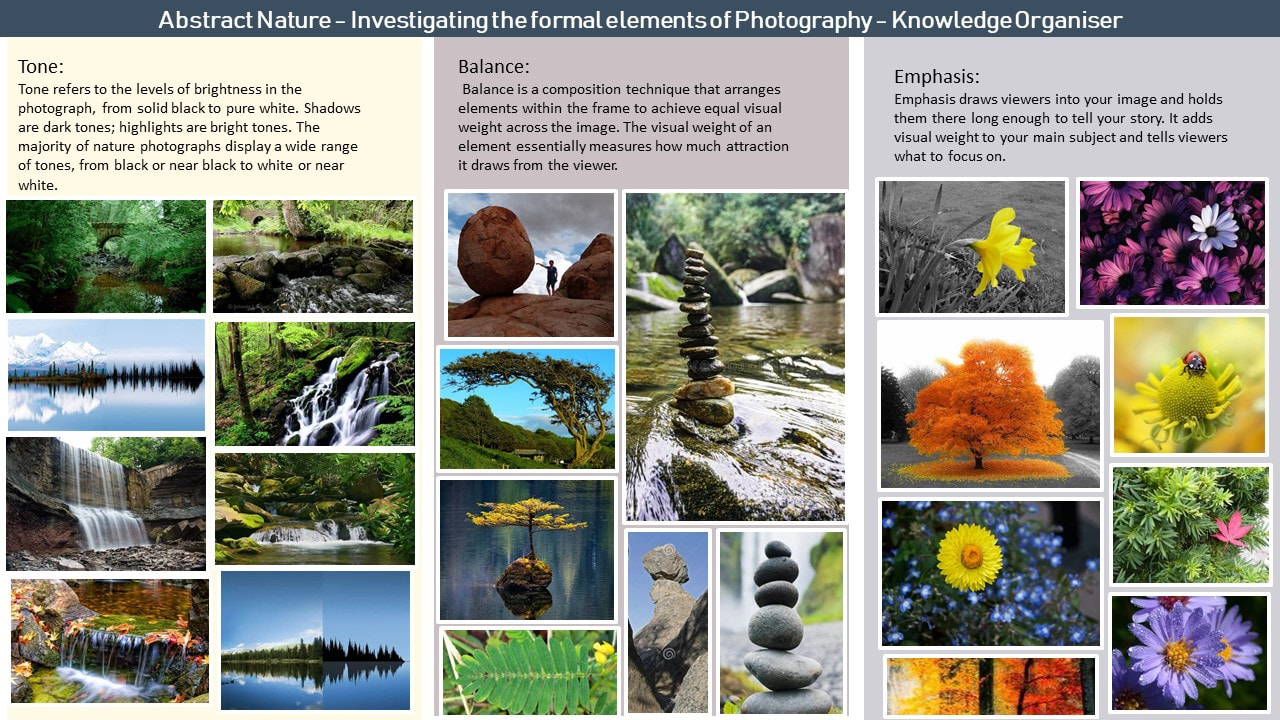
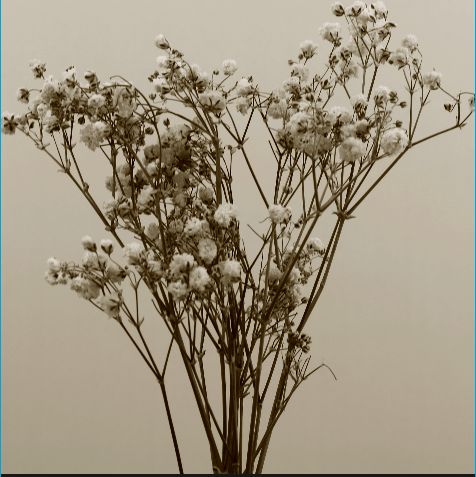
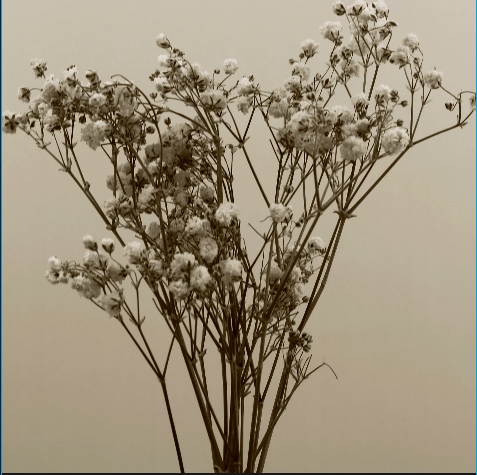
Abstract photography can sometimes be known as non-objective or experimental photography. It mean taking a photo with out taking a photo of the full object like taking a picture of a book but only showing the pages sat together not the cover of the book. Also taking a photo but trying a bit to hide what you are actually taking the photo of so it has the viewer guessing what is actually in the photo. Primarily, abstract photography focuses on the elements of art and the principles of design. These are known as the formal elements of photography. Below are some examples of abstract photography that i am inspired by and some initial research into the formal elements of photography.


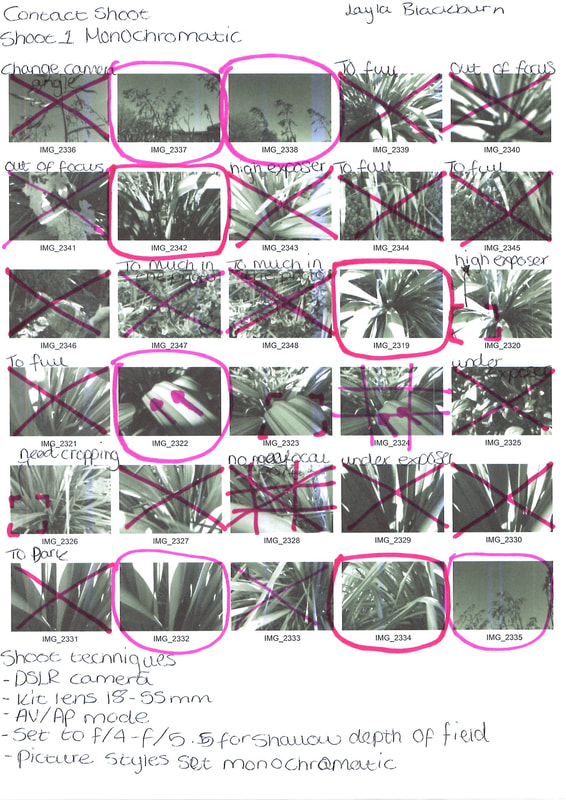
Abstract Nature: INVESTIGATION OF ABSTRACT PHOTOGRAPHY TECHNIQUES / Monochromatic Photography


|
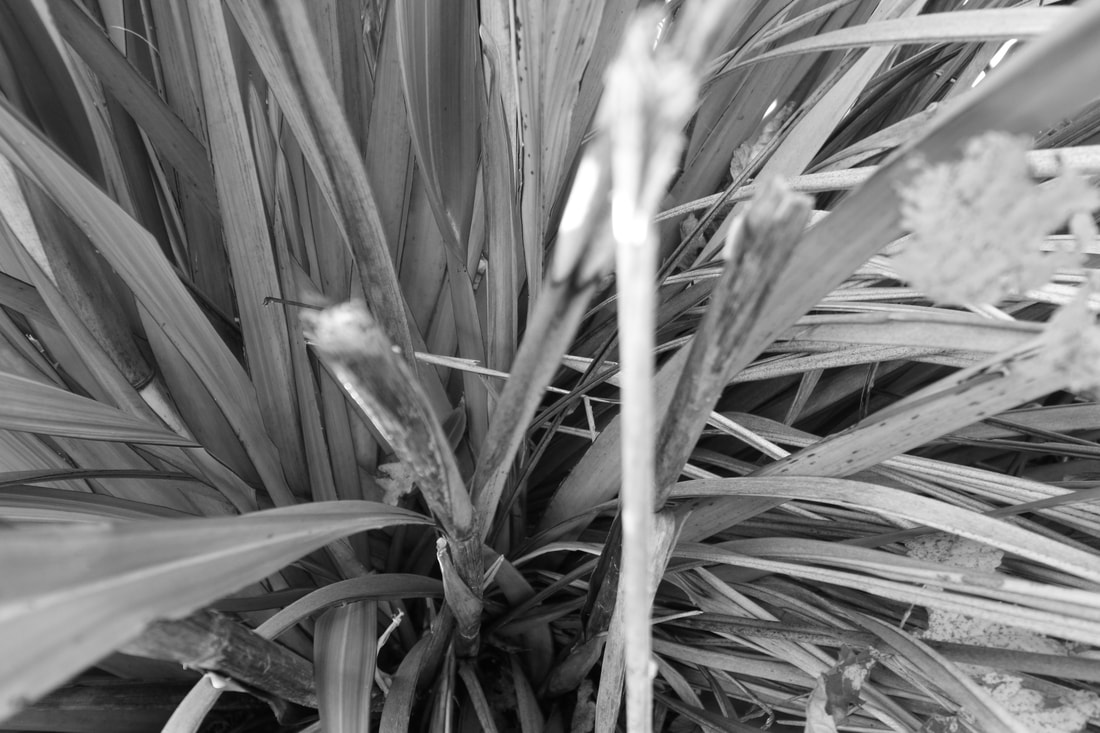
The technique used to take these photos makes the photo black and white, it also has the object of the photo very close to the lens to get detail you wouldn't be able to see from a distance away.
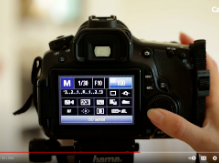
On my shoot I have to set my camera to AV mode also my camera was set to 5.5 shallow depth of field, then I had to set my camera to monochrome (Black and white), also I had to set my camera to the lowest aperture it could go. I had to go outside fine some plant with amazing detail on them and start photographing them making sue I was as close as I could get, but also getting the correct angles of the plant. I think the best bit about shooting in black and white is that it makes little detail on the plant look very nice but I also think it makes them stand out a bit more than just shooting it in colour. It makes the photo different and stand out. It can also give the photo a different mood than just shooting in colour it can make it seem darker. When in reality you could be shooting a bright yellow flower. |


|
Abstract Nature: INVESTIGATION OF ABSTRACT PHOTOGRAPHY TECHNIQUES /ICM


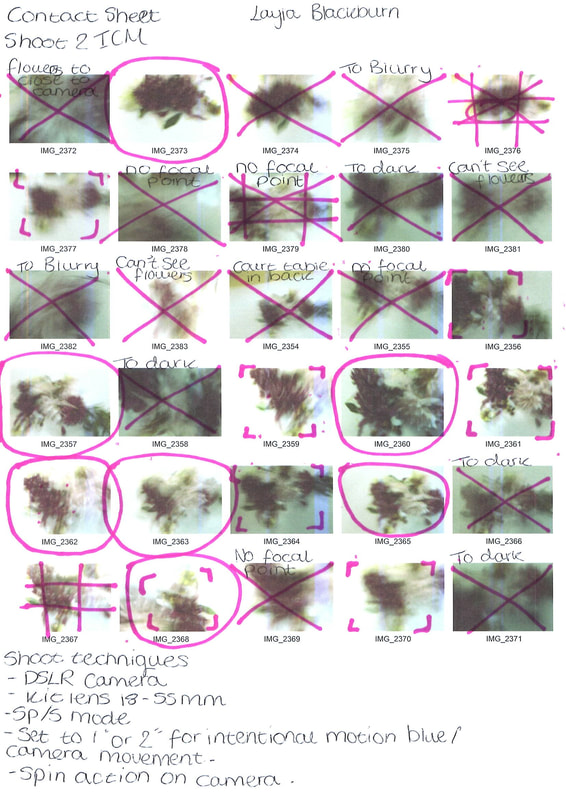
|
The technique used to take this photo makes it blurry but you can also tell what is in the photo, like in my shoot I used purple and white flower and some green leaves to add some colour to the blur in the photo. The technique I used is put a white piece of paper under the object, and as I click the button to take the photo quickly move the camera to create a blur.
On my shoot I intentional moved my camera while shooting to get a blurry image. I collected some flowers and put them on a white sheet of paper and started shoot and moving my camera. I took my photos from eye level so you could actually see the flowers and not just the side. I think taking photos a bit blurry gives the photo some character because it is not just a simple clear photo you see all the time it is a bit different to intentional move your camera so your photo is blurry. When i was taking this shoot the flowers had been out of the ground for a couple of days so they were on the edge of dying which I though gave them that really dark purple. |


|
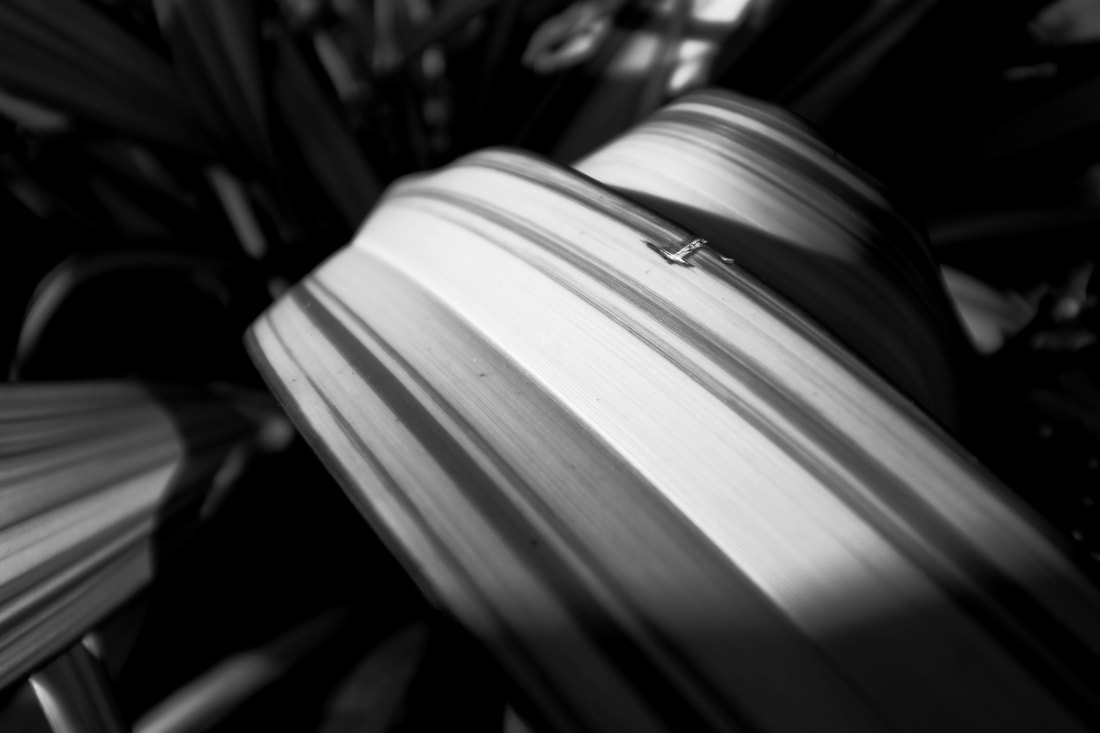
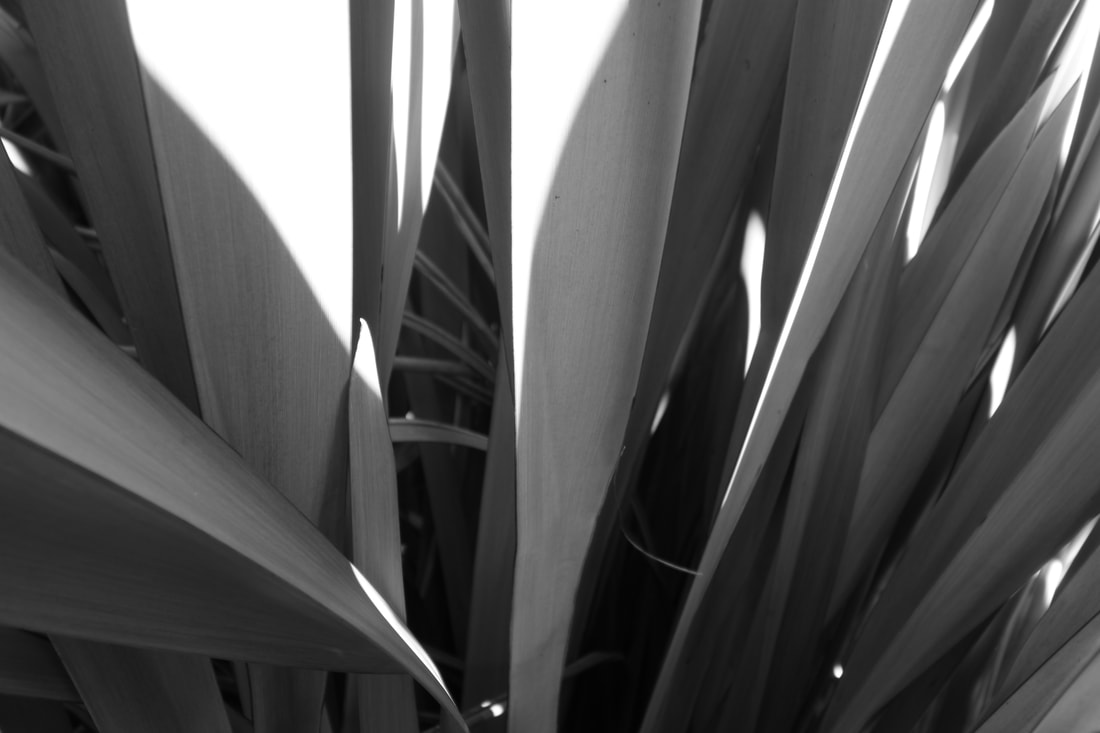
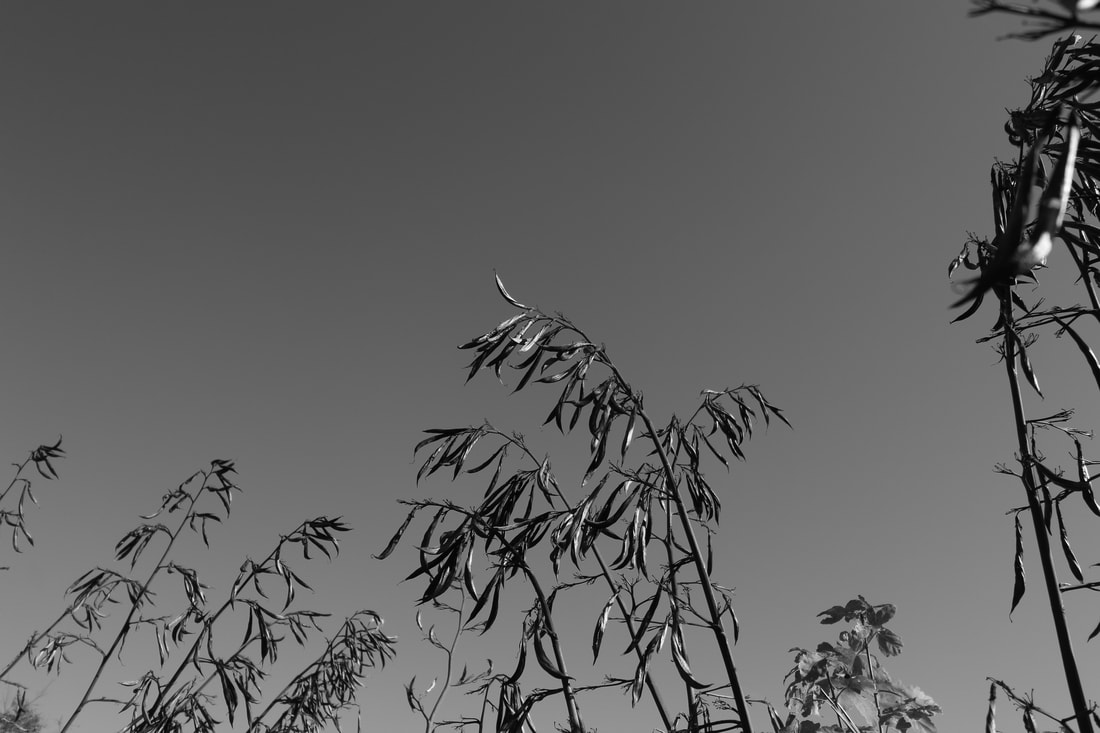
Abstract Nature: INVESTIGATION OF ABSTRACT PHOTOGRAPHY TECHNIQUES /Shallow depth of field


|
The technique used to take this type of photo makes the plant or anything you are shooting look so clear, clean and crisp. It makes little things on the plant like rain drops or colour stand out so much it even blurs the background a little. I this this makes the photos look so professional and full of depth and shadowing.
On my shoot I set my camera to av mode, I looked around my garden for any plants that I thought would look good in a photo, ones with pattern and bright colours, I also went out to take my photos while it was raining so I could capture rain drops on the plants I was shooting and I think it added even more detail to the plant, I also think it made the plant look so much nicer. when I was taking the photos I zoomed in my camera so it was close to the plants but I also made sure I was as close as I could get to the plants so it wasn't just my camera doing the job. The strengths of these photos are that you can get really close up to different natural objects, where you are able to see most of the detail on the nature you are shooting. The benefits of shooting out side is the natural light, But also shooting plants that are outdoors lets real nature like holes in the plants, bugs and rain drops. |


|
Abstract Nature: INVESTIGATION OF ABSTRACT TECHNIQUES, Best EditsAbstract Nature: INVESTIGATION OF ABSTRACT TECHNIQUES, Best Edits
|
I have chosen this images to be edited because of the lines on the plant I really wanted to make them stand out more than they did originally. The strengths on this image is definitely the detail and shadowing on the plant that have been made more obvious after editing.
When editing the photo I cropped the photo a but just to make sure that the focal point was definitely this plant, I also played with the exposer and levels and finally added a tint to the image This image is in full focus and to take the photo I used my cannon camera and the standard kit lens. |
|
This photo got edited because I think the leaves on the plant makes it a good photo and the light from the sun only shining across a few of then this was made more prominent after editing. At first I thought there was to much in the photo but after editing I think it looks good how the leaves almost have a different colour.
When I was editing this photo I tested a lot on it to try make it look better than it did to start with. I cropped the image so I could makes the sunlight one of the main features. I played with the level and exposer, I used my cannon and the standard kit lens when this photo was taken. |
|
When I was shooting this image it was a bit sunny so I knew that this photo was going to need some editing to get it to look good, in this photo I like how the plants look so much darker than the sky but on the plant there are also little light patches all over them.
When I was editing this photo I played with the exposer, I think playing with the exposer made these plants look a bit dead but I feel they look better this way, I looked at the levels and added more of a tint to the photo which I think brought the whole thing together. I used my cannon camera for this and the standard kit lens. |
|
This photo was picked to go on website after editing because i think the plant looks really good, it looks old and broken but it pulls the photo together. before editing it was a bit plain but after making it lighter you can see all the detail on the plant.
When I was editing this photo I knew I wanted to make it lighter because it was quite a dark photo so making it lighter meant that the detail on the plant could be made more prominent. So I played with the exposer and adjusted the levels of the images, I cropped quite a lot out this image because it was just lots of leaves from the plant you can see in the back and I just wanted a few of then in the photo because I wanted the stick to be the focal point. |
Artist Investigation/ Edward Weston
"This then: to photograph a rock, have it look like a rock, but be more than a rock." ~ Edward Weston

Why this artist?
To begin my abstract nature artist investigation, I will intentionally study the work of Edward Weston because he was born before digital camera where a thing but still got some amazing photos. Weston's work is fascinating how from that really old camera you can get such a detailed photos. He has taken such great photos so therefore I think his work work will be good to look at.
Who is Edward Weston?
Edward Weston was born on 24th March 1886 Highland Park US and passed away on the 1st January 1958. He was well known for his photography, Edward Henry Weston was a 20th century photographer. He was called 'One pf the most innovative and influential American photographers' and 'One of the masters of 20th century photography'. Edward was not only known for his amazing photography but also for the thing he says that many have now been made into quotes.
Why this video?
This video is inspirational to me because as I watched it through the some of the photos Edward Weston has produced are the best photos I have seen.
Below are a selection of 10 Weston images that are inspirational to me because these 10 photos are what old imagery would look like.


Semi Analysis/ Edward Weston

Media
This photo has been taken from a short distance, But the whole pepper has been caught in the photo so only the back ground has been cropped out. The pepper has been placed in the foreground. By doing this the viewers eyes are lead the the middle of the photo. This photo has been taken using a Dark Room, using artificial lighting. The light source has been placed above the object, which has highlighted the top and right side of the pepper. This created an atmosphere of highlights, grey tones and shadows. To emulate this photo I would have to find a pepper with a wonky looking form and put it with a black backgtound and set my camera to monochramtic. intent I think this photo conveys a message of lonlyness as the pepper is the only think in the photo, also its in black and white which makes the photo seem sad and singular in the way that theres nothing else around it. It does this by its line, shape, form, colour, shape and shadows. This photo is relavent to my prodject theme becuase weston has photogrpahed a vegetable in the black and white theme, this is what i am doing in my project. The pepper photo is the best one pf his work, but i do think with maybe a bit more light and shadow the photo would look better. |
Subject
The photographer of this image is called Edward Weston who was born on the 24th march 1886. The title of this image is 'Pepper number 30' the image was created in 1930. The genre of this photograph is portrait. The props I can see in this image is a shrivelled up or wonky pepper. Elements The composition of the photo shows the pepper is placed in the centre, forefront of the image. The rule of thirds could have been used but also the object does not just fit in the middle it takes up the whole space. The viewers eye is lead around the photo because of the composition and perspective Edward Weston has used. The perspective the Edward has taken this photo from is eye level because as you can see the whole side of the pepper not the top. The perspective is effective because you can see all the dents and natural forms of the pepper. The photographer employs a range of visual elements in his work. The most striking elements are line, shape and form. Line is shown in this image because of all the lines indented on the pepper, Shape is shown because of the unusual shape of the pepper and finally form is shown as the form of this pepper is unique and has a great effect on the image. 
|


Technical Processes/ Low Key Photography

|
What is Low Key Photography?
Low Key Photography is when an object is made to look more prominent in the photo by making the background black or using a black back drop. Low Key Photography is used to make the photo have more drama and hit hard emotions when people see it. What I think when looking at this flower is the photo feels empty even though there is a flower in the middle of the photo. |
Shoot Plan/ Edward Weston

|
This shoot was inspired by Edward Weston because I thought I would try to emulate his photos because most of his vegetable photos have the same look just different props, I thought I could have a go with different vegetables.
This shoot will take place in a classroom in the middle of the day, when taking the photos I will need to take into account for the lightning and the veg I use. The props I will use are different vegetables, black paper and carboard to set up an L shape on the table, this will mean the artificial light will be placed so it lights up the corner of the L so i can shoot the vegetables with the light at an angle. The light conditions I will require are a dark room with one light shinning on my vegetable. I will experiment using high or low key photography because I could come out with a better outcome using one of them. My subject will be side lit and my lighting will be artificial. I will adjust the white balance to daylight. I intend to shoot with my DSLR camera and a digital lens, I will hand hold it so I have full control over the camera so I can move it were I want it. I will a fast shutter speed so I can can a little amount of light into the camera as the photo is being taken. |
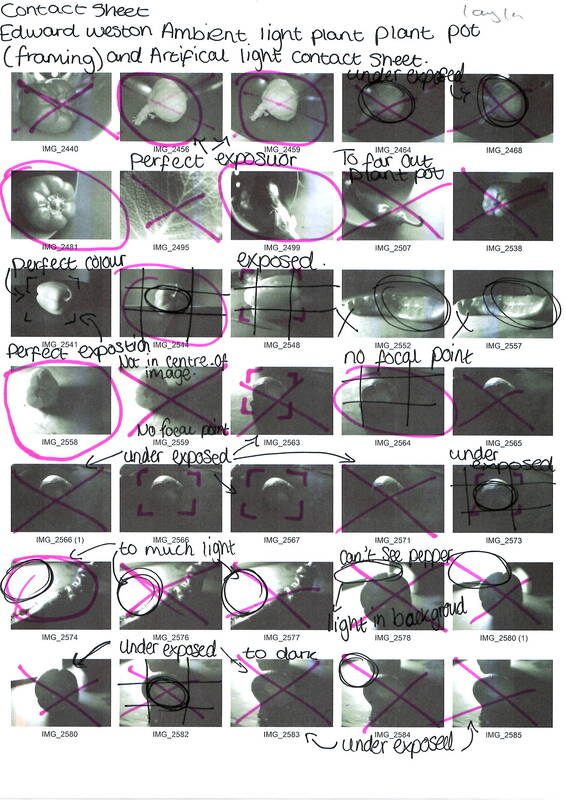
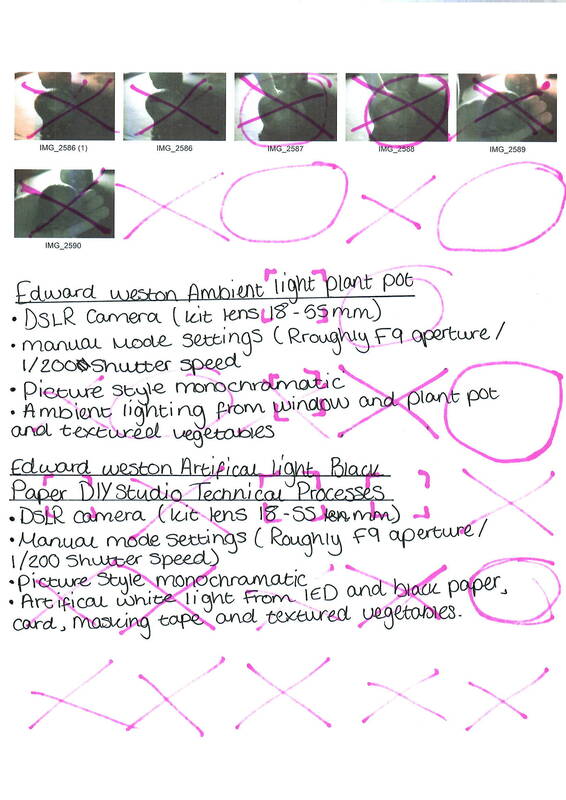
Contact Sheet/ Edward Weston
|
|
Editing Process/ Edward Weston

Step: 1
Firstly i uploads my chosen image onto the software i chose PIXLR-E. |

Step: 2
Here i cropped the image getting ride of anything excess caught in the back ground of my image and to just genrelly make the fruit the main thing in the photo. |

Step: 3
I then played with the contrast and brightness which ended up looking best when i lowered the contrast and increased the brightness. |

Step: 4
For hightights and shadows i ended up increasing them both because i thought it made the photo look better, it makes the fruit look more deap and embeded in the photo. |

|

|
|
Step: 5
To improve my photo even more I then increased the levels on my photo. |
Step: 6
I then lowered the exposer on the image, this left the fruit looking dark but with some more prominent bits of light on it. |
This is the finally out come of my image after going the the process of being edited.

Four Best Images

|
The reason I picked this image to write about is because I think after editing it a bit it definitely made certain things on the fruit stand out a lot more than they did before. This made this photo one of my best ones.
When post-processing, I used PIXLR to adjust the temperature, curves, levels contrast, and I cropped out some of the background to make the fruit more central. When taking this photo I used a plant pot, a piece of fruit, a standard kit lens the come with my cannon camera and I used natural day light. For this photo i tried to make sur my plant pot opening was letting as much of the light for the sun it, so my fruit can get shadows and reflections of light bouncing of it. |

|
The reason I picked this image is because after editing the patterns on the vegetable leaf was made a lot clearer and can be seen in more detail.
When post-processing, I used PIXLR to change the levels, contrast, temperature, I cropped out some of the leaf from this image because I felt that the leaf in the corner was blurry. When taking this photo I used a plant pot, a cabbage leaf and natural day light. I put the leaf facing away from the day light so I would get that shadow in the top left corner, I think the shadow makes the detail lines of the leaf look a lot more detailed. After editing this image and playing around with the settings i think the final product is definitely an improvement from the original. |

|
The reason I picked this picture to be one of the best four is because I think after editing the pepper it looks older and a bit more damaged and I think that is what made me want to pick this photo.
When post-processing, I used PIXLR to adjust the levels, contrast, temperature and cropped the image to get ride of anything caught in the back of my photo. When taking this photo i turned my plant pot away from the window so the natural sun light could shine through the wholes in the back of the plant pot, as you can see in the back of the photo. |

|
I think the strengths of this image is that after editing the cracks and broken skin on the garlic where made more seen. It makes the garlic more interesting to look at as it is not perfect.
When post-processing, I used PIXLR to adjust the contrast, levels, temperature and I also cropped this image as the garlic is small so to my the details more seen I cropped the image down. When taking this image I had my plant pot facing away from the window so the light would shine through the back, nut you cant see this as I cropped the image down. |
Abstraction through Cyanotypes/ Anna Atkins

Carix (America)
Created: 1848 By: Anna Atkins |
Who is Anna Atkins?
Anna Atkins ( born 16 march 1799, died 9 June 1871 aged 72) was a English botanist and photographer. From what we know she is potentially the first woman to create a photograph and make a published book illustrated with photographic images. In her work she has great detail captured in her photos. What are cyanotypes? The cyanotype is a photographic printing process that produces blue prints using coated paper and light. What are the advantages of cyanotypes? The cyanotype process is relatively cheap and easy to use. A wide range of surfaces can be coated with the mixture of chemicals and you don't need a darkroom or any complicated equipment. What are disadvantages of cyanotypes?
The sensitizer is often not well absorbed by the paper and some tends to lie on the surface being hygroscopic, It causes a tackiness which can wreck your negative. 
|
Examples of cyanotypes

|

|

|

|

|
When creating my cyanotpyes, we started by gathering some water colour paper and coating in a solution made from iron salt. We use water colour paper as it is thicker and can absrob liquid more than normal paper which would just tire. Using water colour paper also makes the final out come alot more bolder.
We then did the same onto a peice of fabric, We then picked one of our favourite images from our Edward Weston shoots and created a positive of that. We then did an invert of it to create a negative on acetate, We finally went on to PIXLR E and inverted the image to acheive our negative. This means that the light will be dark and the dark will be lighter. To improve my final outcomes on some of the cyanotpyes i would have pick better leaves to make the outcome nicer. But over all i think they turned out nice concidering we only got one chance to make them. |
Abstraction through Photograms/ Man Ray
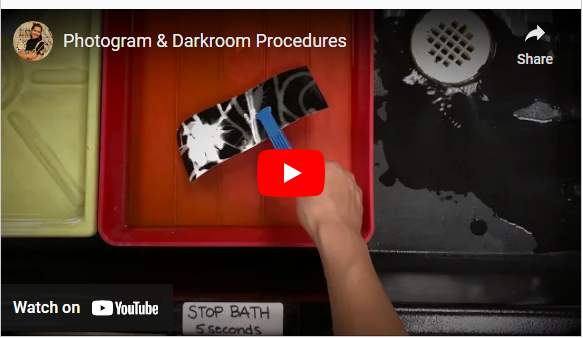
|
Who is Man Ray?
Man Ray, original name Emmanuel Radnitzky, (born August 27, 1890, Philadelphia, Pennsylvania, U.S.—died November 18, 1976, Paris, France).Man Ray was an American visual artist who spent most of his career in Paris. He was a significant contributor to the Dada and Surrealist movements, although his ties to each were informal. He produced major works in a variety of media but considered himself a painter above all. What are photograms? A photogram is a photographic image made without a camera by placing objects directly onto the surface of a light-sensitive material such as photographic paper and then exposing it to light. |
Examples of photograms.


Dark Room set up.


Horst P Horst/ unfamiliar and Abstracted


Rotations Monochromatic.


Rotations cyanotypes.


Technical Processes/ High Key.

|
High Key Photography is a term to describe images that are bright and contain little to no shadow. It is also sometimes used to the photographic style that is simply bright, often with an overexposed background. Here are some examples of High Key Photography:
Recommended setting from video:
|


Using high key lighting gives your image a unique look. These photos are perfect for creating a happy feeling when the viewer sees the image. If you want to convey a sense of joy, high key lighting is typically the best way to do that.
My example.

|
Equipment needed to create image.
|


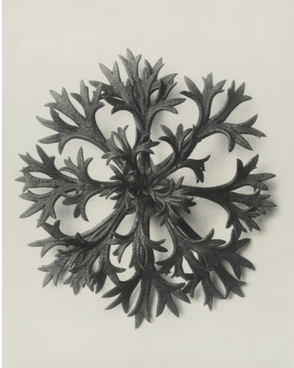
Artist investigation/ Karl Blossfeldt.
The plant never lapses into mere arid functionalism; it fashions and shapes according to logic and suitability, and with its primeval force compels everything to attain the highest artistic form. - Karl Blossfeldt
My botanical documents should contribute to restoring the link with nature. They should reawaken a sense of nature, point to its teeming richness of form, and prompt the viewer to observe for himself the surrounding plant world. - Karl Blossfeldt

|
Why this artist?
Blossfeldt links to our topic of abstract nature, as he shoots a lot of nature photos. He influences a lot of modern day photographers. Who is he? Karl Blossfeldt was a German photographer and sculptor. He is best known for his close-up photographs of plants and living things, published in 1929 as Urformen der Kunst. He was inspired, as was his father, by nature and the ways in which plants grow. |
why this video?
I chose this video because it shows an array of Karl's work and some of his best photos, it also explains a lot about Karl and his photography and I think that is necessary when studying a photographers work.
I chose this video because it shows an array of Karl's work and some of his best photos, it also explains a lot about Karl and his photography and I think that is necessary when studying a photographers work.
Karl Blossfeldt. High Key Photography - shoot plan diagram.

|

|

|

|

|
Shoot plan/ Karl Blossfeldt.
This shoot was inspired by Karl Blossfeldt as he is the photographer we have been studying and looking at the way he creates abstract forms from nature, I am going to try to emulate the style of photo he takes.
This shoot inspired by Karl will take place in a classroom as the lighting is easier to control in the room, We are going to be setting up three types of shoots the ones from the plans above to experiment different techniques of High Key Photography.
The objects used in the shoot will all be natural forms such as seeds and shells as that is mainly what Karl uses in his shoots of Natural Forms. I will also be using a white back drop as that will make the high key look better.
I will shoot in High Key for my images using soft box, remote flash, Perspex diffusers and natural ambient light. I will need to keep good control on the lighting to avoid shadows and distance my subject matter away from my back drop.
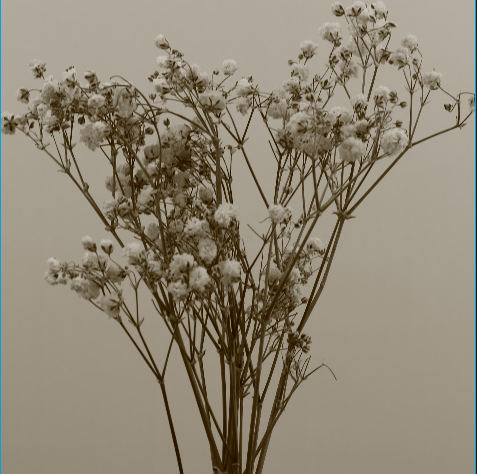
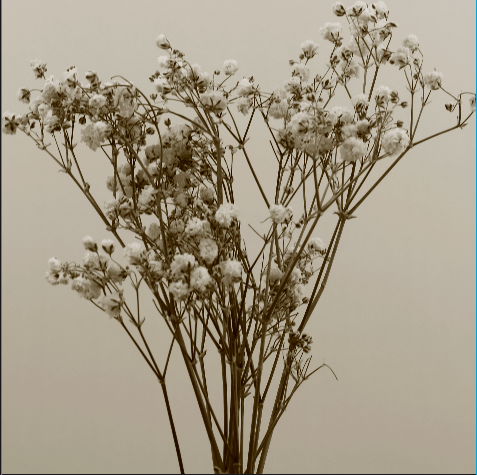
I will be using school cameras when shooting my High Key shoots (DSLR 4000d/ Prime lens 50mm/ Macro lens) and i will be using my own camera as well. I intend to shoot in sepia to give an aged looking photo selection.
In all of 3 the shoots in will aim to use a slower shutter speed to let more light into my camera lens, I will be putting the camera on a tripod/books so finer details can be captured.
This shoot inspired by Karl will take place in a classroom as the lighting is easier to control in the room, We are going to be setting up three types of shoots the ones from the plans above to experiment different techniques of High Key Photography.
The objects used in the shoot will all be natural forms such as seeds and shells as that is mainly what Karl uses in his shoots of Natural Forms. I will also be using a white back drop as that will make the high key look better.
I will shoot in High Key for my images using soft box, remote flash, Perspex diffusers and natural ambient light. I will need to keep good control on the lighting to avoid shadows and distance my subject matter away from my back drop.
I will be using school cameras when shooting my High Key shoots (DSLR 4000d/ Prime lens 50mm/ Macro lens) and i will be using my own camera as well. I intend to shoot in sepia to give an aged looking photo selection.
In all of 3 the shoots in will aim to use a slower shutter speed to let more light into my camera lens, I will be putting the camera on a tripod/books so finer details can be captured.
SEMI Analysis/ Karl Blossfeldt.
|
Subject The photographer of this image is Karl Blossfeldt and the title of this image is Saxifraga Wilkommiana (Willkom's Saxifrage.) The genre is portrait and still life. The props I can see in this image is a plant that has been photographed in high key. Elements The composition of this image is central at the forefront of the image, when using the 'rule of thirds' the focal point of this image is right in the centre as the plant is perfectly central to the image. The viewers eye is lead around the photo because of the composition and perspective Karl Blossfledt has used. The photographer employs a range of visual elements in his work. One of the most striking elements is the high key used as the bright white background contrasts with the black plant. Media This photo has been taken from a short distance. This is so the main focal point of the image is the centre of the plant, The photo has been taken in high key so there are no shadows created. To create an image like this I would have to research the camera setting Karl had to create the high key image. Additionally I would have to look at what sort of lighting Karl used. Intent I feel the photo conveys a message of coldness and an empty feeling. I does this by the white background on a High Key images, the space in the image makes the image feel empty and has no life. Our project theme is to create a selection of high key images inspired by Karl so it is relevant to look at his work and study what he does and how he takes his images, to help me when I emulate his work. |
Saxifraga Wilkommiana (Willkom's Saxifrage)
|


Karl Blossfeldt work.


Editing process.
This is before editing. I didn't have to crop the image as it is already central in the frame.
|

Step 1
Firstly I increased the brightness and contrast on this image, which made the flower buds stand out a bit more. |
Step 2
Secondly I increased the highlights and decreased the the shadows which made the image seem darker. |
Step 3
Thirdly I increased the levels which made the steams of the flower a lot darker I think. |
Step 4
Finally I decreased the curves on the image which defiantly made the flowers in the image look darker. |

Here is my final image.
|
9 Best Images.


Remote Flash Contact Sheet.

Back Drop Direct Shoot Contact Sheet.

Aerial Photography Contact Sheet.

|

|
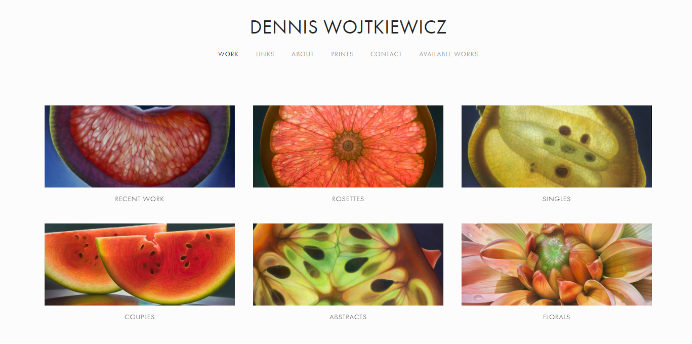
Artist investigation/ Dennis Wojtkiewicz
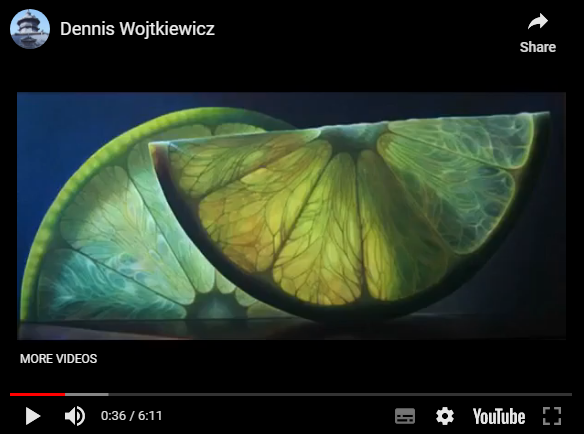
https://www.youtube.com/watch?v=feo2Pou75_E
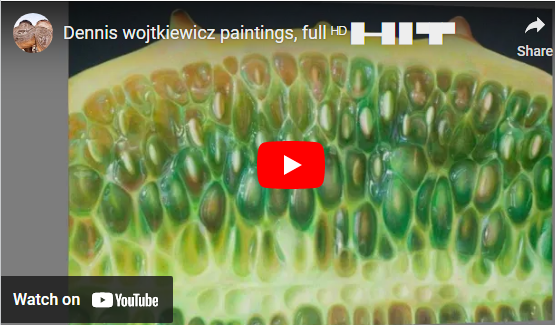
https://www.youtube.com/watch?v=QwZPLu69FP8
Link to Dennis's website
|
Email Quote- Direct Artist response
I use a Canon EOS 90D camera with a Canon EF 100mm f/2.8 Macro USM fixed lens. The only reason I even know about the technology is because my colleague told me that's what I needed and would be the biggest bang for the buck. The rest of it is all by feel. I have absolutely no photo training. For me that suffices because I'm not hung up on technical stuff. Just looking for ways to capture information for my paintings. Dennis Wojtkiewicz/ January 2021 Why this artist? We have picked this artist as he fits in perfectly with our abstract nature theme. But also he differs from the Photographers we have researched before are Dennis only takes his photos of fruit so that he can capture detail that wouldn't be caught by the naked eye to then create a painting with the photo. Who is he/she? Dennis Wojtkiewicz was born in 1956 in Chicago and is most famously known for his paintings of sliced fruit and flowers. His nationality is polish. His website is: www.wojtkiewiczart.com Why the quote? The quote is from a direct email response from Dennis. W himself. From the email i can learn that Dennis only learnt his tequinces from one of his colleges that thought the photos would help him come out with a better outcome on his painting. Why this video? This video is inspirational to me because it shows all of Dennis work including the flowers even though our main focus is the fruit. When Dennis has painted his fruit it almost looks like fairy tale fruit. It doesn't look real but it looks mouth watering and really pretty. The colours are what the fruit would ordinarily look like but he makes them look vibrant and striking. Dennis puts a lot of detail into his work but at the same time makes it look so minimal and simplistic. |


Photographic Techniques/ Back lighting fruit.
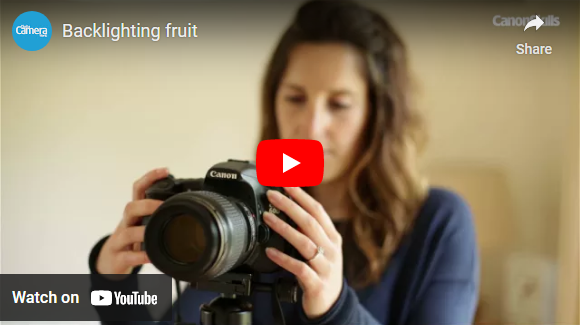
https://www.youtube.com/watch?v=zErEjr07H8Y
|
This is the link for the Back Lighting tutorial: www.youtube.com/watch?v=zErEjr07H8Y
What is Back lighting and the benefits of it? Backlight in photography involves positioning the main light source for a photograph behind the primary subject. Backlighting is a popular technique among skilled photographers, but it can also present unique challenges for exposure and composition. Backlight photography emphasizes the depth behind the subject and gives images a greater sense of place. Dramatic effect. Backlighting can produce a dramatic contrast between the subject and the background. This can be an especially effective technique when shooting outdoor portraits. Equipment you will need:
|


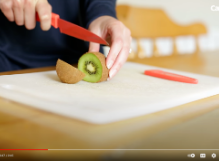
Step 1: Cut your fruit of choice into thinly chopped even pieces.
|
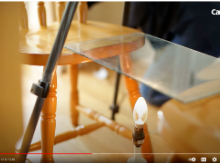
Step 2: Set up your lay out and get all you equipment set up.
|
Step 3: Set your camera to make sure you get the best outcome on your images.
|

Step 4: Finally take your photos.
|
Shoot Plan Diagram/ Dennis Wojtkiewicz

|
Shoot Plan:
From researching the work if Dennis Wojtkiewicz, it has inspired me to try and emulate his work. To try and create similar work to his is will be shooting indoors under controlled light. The camera will be over the glass sheet attached to a tripod with a light source underneath to really make the detail on the fruit pop out, which can become even more noticeable when edited. In my shoot I will be using a variety of different fruit just to make sure I can get the best selection and in the end have multiple photos I can choose from. My camera will be set on a slow shutter speed to make sure only a little light will be let into the camera to get more detailing on the fruit, the camera will have a 2 second time to ensure there is very little camera shake so my photos are in full focus to get the best quality in the end. |
Explosion sketchbook.
Here is my Explosion sketchbook created with all images of my own.

|
|
|
Contact Sheets/Dennis Wojtkiewicz

|

|
edited image/ Dennis Wojtkiewicz
|
Step 1: Firstly I did some adjustments to my photo to make sure the detailing really stood out in the final image.

Step 4: I then changed some of the oranges into black and White to add some differ to the selection which makes the orange oranges pop out a lot more.
|
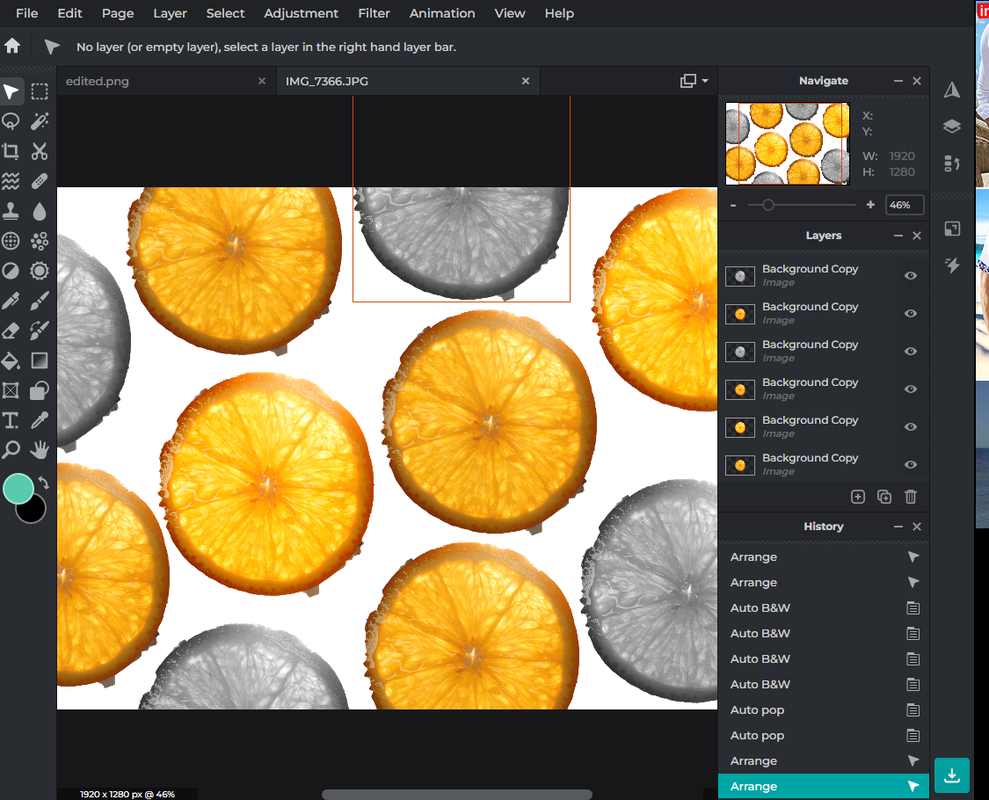
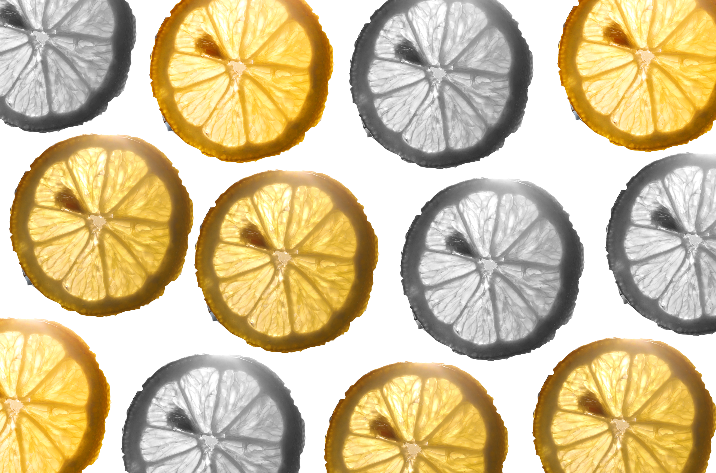
Step 2: Then I used the lasso tool on PIXLR to make it so my orange stood alone on a white background that i edited in.

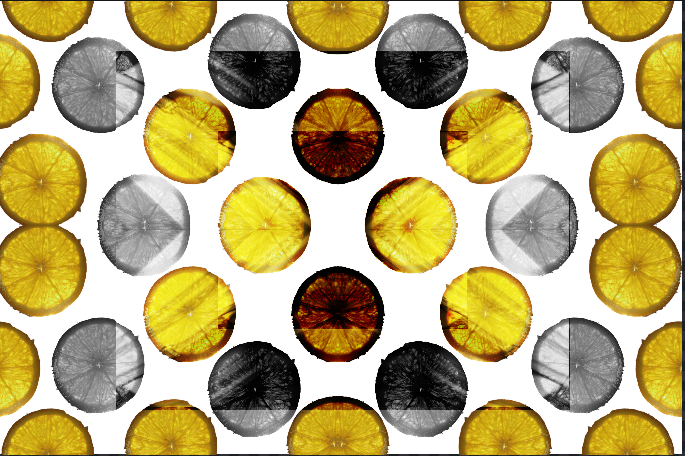
Step 5: Finally I rotated the image 4 time to make it look different and more complicated to the eye.
|
Step 3: After I made sure I was happy with how my orange look I them duplicated it many time to create a series of oranges.

|
Here is the final image after all editing was completed.

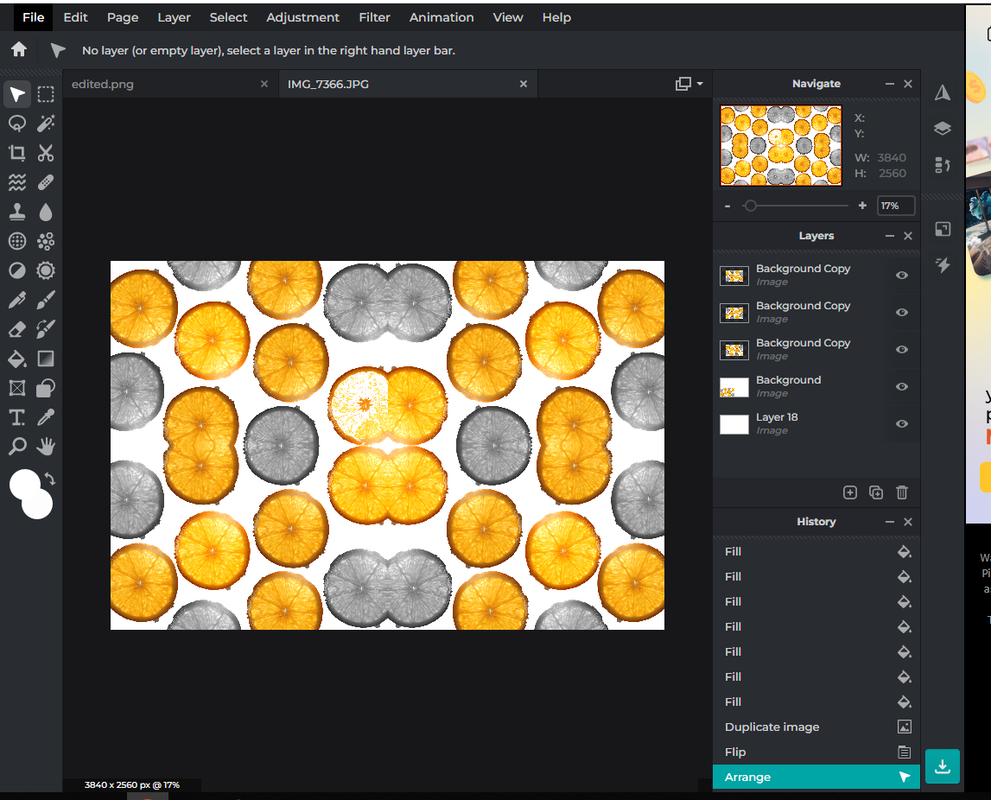
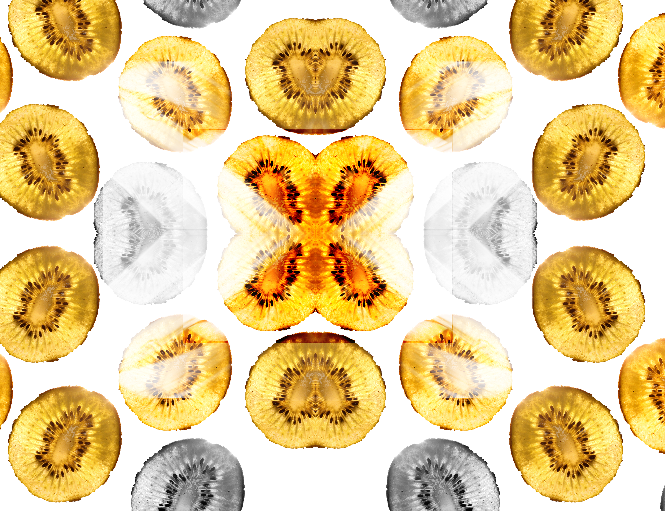
Rotational Designs / Dennis Wojtkiewicz
Rotational Designs / Dennis Wojtkiewicz Using rotational symmetry and the work of Horst P. Horst I have created a series of rotational designs using the abstract elements of shape, colour, form, tone, repetition and harmony. I will develop these further using PIXLR.


|

|
Collage Process in MOCK Exam.

Final Outcome MOCK Exam.

Evaluation/Dennis Wojtkiewicz
Throughout this project I have developed my understanding of Abstract Photography by exploring the theme of Nature. In the project of abstract nature I have studied in great detail multiple Photographers and Artists, while having the final outcome of trying to emulate their work. Through studying various Photographers work I have gained a great understanding in photography and the great things you can create with just a camera, some light and a simple piece of nature. Trying to emulate these pieces of amazing work has lead to my knowledge and skills being developed to help me create the best outcome I can. I have realised the more I know about the Photographer and their techniques and ways of work the better my outcome is and the easier it is to create. The theme Abstract Nature has made this project very easy to attend to as Nature is everywhere plus easy to access, also making things abstract is easy to complete. Its lovely to see how nature can still beautiful in abstract form as well as editing.
The first Photographer I studied was Edward Weston while studying Edwards work in great depth, we saw for the first time how many photos Photographers actually created, which is an amazing technique to make sure you have multiple photos to pick from. Which is why we have a great number of photos on our contact sheets after our first shoot and have multiple on other shoots after. In the research of Edward Weston we had to create a SEMI anyalis of his famous photo 'pepper no.30' which I found the easiest to write on because I felt their was so much to say about this image and Edwards work to create it. This photographers work inspired me in so many ways in photography but one of the main ones was because of how much detail his photos hold in just one still image but for instance 'pepper no.30' is full of shadows and highlights all over the pepper which you can see highlighted in the SEMI I wrote. Their work helped me understand the theme of abstract nature by showing how much you can create with just a piece of nature or how perfect am image can be from using such a simple subject, a piece of fruit or nature.
The second person we investigated after Edward Weston was Anna Atkins one of the main things Anna did was create cyanotypes, while we were in the study of Anna we emulated her work by creating cyanotypes. My emulation work is on my website in the Anna Atkins section. In this section of my photography work we studied Anna in great detail and her work and processes of how she creates her cyanotypes. When looking at information about her I found out that she is maybe the first ever woman to create a Photograph, why I think she was a great Photographer to study and emulate her work. I think Anna Atkins was the perfect Photographer to fit into our topic about Abstract nature as most of her work is created with natural forms. All her work has so much detail and is clearly completed with a lot of thought behind what the final outcome will be. She defiantly choses the nature that will be used with a lot of detail to know what will look best. When looking at Annas work I found it very interesting to see photos can be produced without a camera. During the section I realised Anna work holds lots of line and patterns for the various pieces of nature she uses.
The next person we studied was Man Ray and although we did not go into great detail or study him for long his work really did inspire me. Man Ray produced a type of photograph called a photogram and I feel his work just looks so simple and peaceful to look at and really goes well with our topic of Abstract nature as the section of his work we looked at he uses nature to create his photograms. In his work you can really see lots of contrast better the black and white as that is what a photogram is made up of, some of the photos of his work on my website you can really see movement on the image although it isn't actually mid movement I can just see it.
Then we moved on to the Photographer Karl Blossfeldt after studying Man Ray in less detail we really look at Karl's photos and techniques. Karl shoots his photos in high key which means the background of his images are white. His work inspired me as I feel it looks so crisp and clean with a white background, Also makes the object in the picture standout far more and little details more noticeable. Studying Karl in great detail meant that when it came to emulating his work I could at least try to the best of my ability to get the best outcome possible. This photographers work goes well with our theme of Abstract nature as he makes simple different pieces of nature look so crisp and clean, sharp and deep.
The very last person we looked at was Dennis Wojtkiewicz, we studied Dennis in even more detail than the rest as his work we were emulating for out year 10 MOCK. Dennis's work is very colourful and bright with I love. Dennis's work inspired me the most by far and I think looks the best section on my website. His work is full of colour, pattern, line and many more. It fits perfectly into our topic of Abstract nature and although it is not leaves and flowers he shoots its still nature of some sort and defiantly connects to the abstract part of our topic. When trying to emulate his work I found it great to see how you can go to one not very nice photo with no editing to a powerful, colourful, unique photo. When editing the images you can really experiment with all you shadows and contrast to find what you think looks best. My two best outcomes are on my website and one was used in my MOCK Exam.
I feel the most successful outcome of this project was my Dennis final outcome as my skills in photography progressed the more emulations we completed. This final outcome was my favourite as I feel it was the most colourful and I could experiment a lot more with this artists work because if the very big variety or creations he come up with and produced. When doing the shoot I felt that the photo I took didn't have to be the best because the photo went through heavy editing anyway. The areas of improvement I think I can do is going into more detail when I write about things, like a shoot plan and writing up about my best images.
